Traditional Israeli Bread Recipe

A Taste of Israel in Every Slice
Explore the heartwarming tradition of Israeli bread-making with this authentic recipe, perfect for family gatherings and celebrations.
Image illustrating:Traditional Israeli Bread Recipe
3
David Pliner
Culinary & Israeli Heritage Enthusiast
Discover the rich flavors and traditions of Israeli bread with this authentic recipe. Perfect for sharing with family and friends.

Health Benefits

  • Rich in carbohydrates for energy.
  • Contains healthy fats from olive oil.
  • Low in sugar, making it a healthier bread option.

Ingredients

All-purpose flour
4 cups
Warm water
1 1/2 cups
Active dry yeast
2 teaspoons
Salt
1 teaspoon
Olive oil
2 tablespoons
Honey
1 tablespoon

Chef's Tips for Perfect Israeli Bread

For a perfect crust, brush the dough with olive oil before baking. Let the dough rise in a warm place for a softer texture. Experiment with toppings like sesame seeds or za'atar for added flavor.

Instructions

  • 1
    1
    Prepare the Yeast Mixture
    In a small bowl, combine warm water, yeast, and honey. Stir gently and let it sit for about 10 minutes until it becomes frothy. This step ensures that the yeast is active and ready to work its magic in the dough.
  • 2
    2
    Mix the Dough
    In a large mixing bowl, combine the flour and salt. Make a well in the center and pour in the yeast mixture and olive oil. Mix until a rough dough forms. Knead the dough on a floured surface for about 10 minutes until it becomes smooth and elastic.
  • 3
    3
    First Rise
    Place the dough in a lightly oiled bowl, cover it with a damp cloth, and let it rise in a warm place for about 1 hour or until it doubles in size. This rising time allows the dough to develop flavor and texture.
  • 4
    4
    Shape the Dough
    Punch down the risen dough to release air bubbles. Divide it into two equal parts and shape each into a round or oval loaf. Place the loaves on a baking sheet lined with parchment paper.
  • 5
    5
    Second Rise
    Cover the shaped loaves with a damp cloth and let them rise again for about 30 minutes. This second rise helps the bread achieve a light and airy texture.
  • 6
    6
    Bake the Bread
    Preheat the oven to 375°F (190°C). Brush the loaves with olive oil and sprinkle with sesame seeds if desired. Bake for 25-30 minutes or until the bread is golden brown and sounds hollow when tapped on the bottom.
  • 7
    7
    Cool and Serve
    Remove the bread from the oven and let it cool on a wire rack. Allow it to cool completely before slicing. Enjoy the bread with your favorite spreads or as a side to your meal.

The Story Behind Israeli Bread

Israeli bread has deep roots in cultural traditions.

Bread has always been a staple in Israeli households, symbolizing sustenance and community. From the bustling markets of Jerusalem to family kitchens, bread-making is a cherished ritual. Each loaf carries stories of generations, connecting the past with the present.
The art of bread-making in Israel involves a blend of techniques passed down through families. The process is more than just mixing ingredients; it’s about honoring traditions and creating something that nourishes both body and soul. The aroma of freshly baked bread is a comforting presence in many homes.
In Israel, bread is often shared during meals, embodying the spirit of togetherness. Whether it’s a simple weekday dinner or a festive celebration, bread holds a place of honor at the table. It serves as a reminder of the importance of community and the joy of sharing food with loved ones.

The diversity of Israeli bread reflects the country’s rich cultural tapestry.

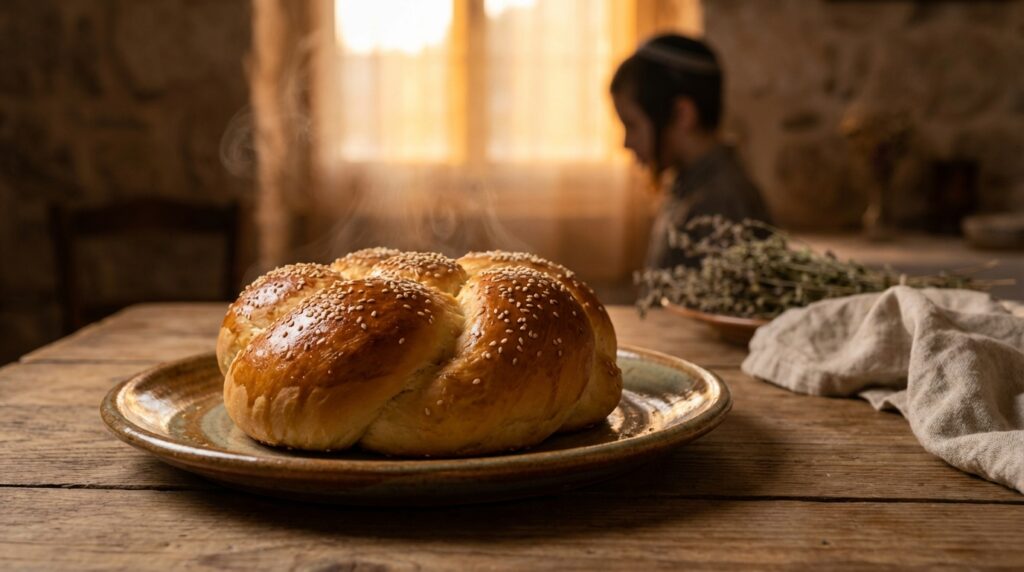
From challah to pita, each type of bread tells a unique story. Challah, with its braided form, is a symbol of unity and peace, often enjoyed during Shabbat. Pita, with its pocket, is perfect for holding flavorful fillings, making it a versatile choice for any meal.
The ingredients used in Israeli bread are simple yet meaningful. Flour, water, yeast, and salt come together to create something extraordinary. These basic elements are transformed through skill and care, resulting in bread that is both nourishing and delicious.
Baking bread is a sensory experience, engaging sight, smell, and touch. The feel of the dough, the sight of it rising, and the smell of it baking are all part of the magic. It’s a process that brings joy and satisfaction, connecting the baker to a long line of tradition.

Israeli bread-making is a celebration of heritage and innovation.

While traditional recipes are cherished, there’s also room for creativity. Bakers often experiment with different flours, seeds, and spices, adding a personal touch to classic recipes. This blend of old and new keeps the tradition alive and exciting.
Bread-making workshops and classes are popular in Israel, attracting both locals and tourists. These gatherings are an opportunity to learn, share, and celebrate the art of baking. Participants leave with more than just a loaf of bread; they gain a deeper appreciation for the craft.
The role of bread in Israeli culture extends beyond the kitchen. It’s a symbol of hospitality and generosity, often given as a gift to welcome guests. Sharing bread is a way to express love and care, making it an integral part of social interactions.

Related Recipes

FAQ

Can I use whole wheat flour instead of all-purpose flour?
Yes, you can use whole wheat flour for a healthier version, but it may alter the texture slightly.
How should I store the bread after baking?
Store the bread in an airtight container at room temperature for up to 3 days.
Can I freeze the dough for later use?
Yes, you can freeze the dough after the first rise. Thaw it in the refrigerator before shaping and baking.