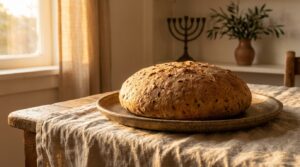
Homemade Israeli Pita Bread

Soft, Fluffy, and Perfectly Puffing Pita
Learn to make authentic Israeli pita bread, a beloved staple in Middle Eastern cuisine, perfect for sandwiches or dipping.
Image illustrating:Homemade Israeli Pita Bread
7
David Pliner
Culinary & Israeli Heritage Enthusiast
Discover the rich history and delicious taste of Israeli pita, a staple in Middle Eastern cuisine. Learn to bake this soft and fluffy bread at home.

Health Benefits

  • Pita is a low-fat bread option, making it a healthier choice for sandwiches.
  • Rich in carbohydrates, pita provides a quick energy boost.
  • The pocket feature allows for portion control, helping manage calorie intake.

Ingredients

All-purpose flour
3 cups
Warm water
1 cup
Active dry yeast
1 packet
Salt
1 teaspoon
Olive oil
2 tablespoons

Chef's Tips for Perfect Pita

For the best results, use a pizza stone to bake your pita. Preheat the stone in the oven to ensure even heat distribution, which helps the pita puff perfectly. Allow the dough to rest properly to develop gluten, giving the bread its soft texture. Experiment with different toppings like za'atar or sesame seeds for added flavor.

Instructions

  • 1
    1
    Prepare the Dough
    In a large bowl, combine the warm water and yeast. Let it sit for about 5 minutes until frothy. Add the flour, salt, and olive oil. Mix until a dough forms.
  • 2
    2
    Knead the Dough
    Transfer the dough to a floured surface and knead for about 10 minutes until smooth and elastic. Place the dough in a greased bowl, cover, and let it rise for 1 hour or until doubled in size.
  • 3
    3
    Shape the Pitas
    Punch down the dough and divide it into 8 equal pieces. Roll each piece into a ball and then flatten into a circle about 1/4 inch thick.
  • 4
    4
    Preheat the Oven
    Place a pizza stone in the oven and preheat to 475°F (245°C). Allow the stone to heat for at least 30 minutes to ensure it's hot enough.
  • 5
    5
    Bake the Pitas
    Carefully place the dough circles on the hot pizza stone. Bake for 3-5 minutes until the pitas puff up and are lightly golden. Remove from the oven and cover with a clean towel to keep them soft.

The Story of Israeli Pita

Pita has been a staple in Middle Eastern diets for centuries.

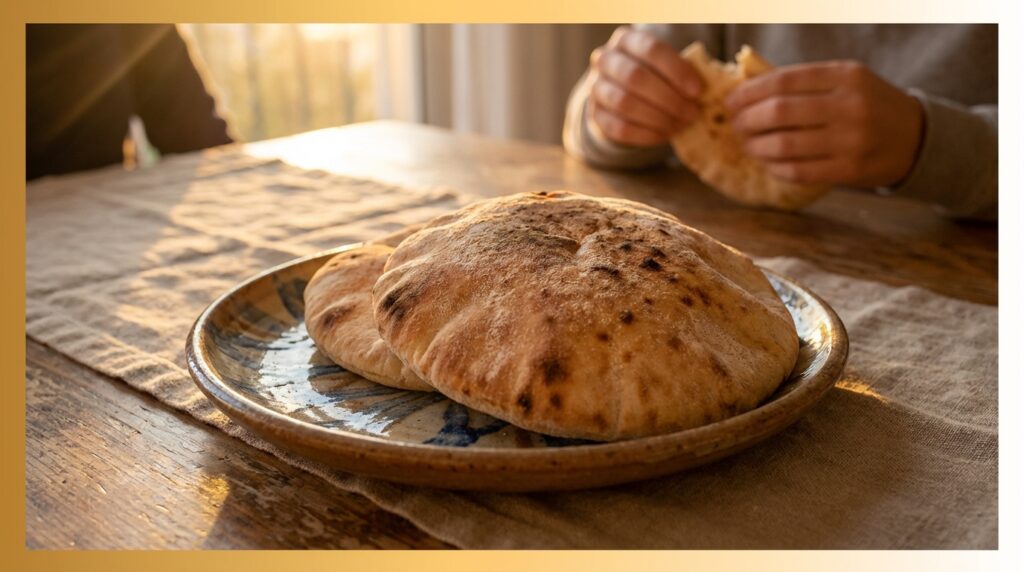
The origins of pita bread trace back to ancient times, where it was a crucial part of daily meals. Its simple ingredients and quick baking process made it a favorite among various cultures. Over time, pita became synonymous with Middle Eastern cuisine, cherished for its versatility and unique pocket feature.
In Israel, pita holds a special place in culinary traditions. It is often enjoyed with falafel, hummus, and a variety of salads. The bread’s ability to hold fillings makes it ideal for on-the-go meals, reflecting the vibrant street food culture in Israeli cities.
The process of making pita involves a high-temperature bake that causes the dough to puff up, creating the characteristic pocket. This technique has been passed down through generations, with each family adding their own twist to the recipe.

Israeli pita is known for its softness and perfect puff.

The texture of Israeli pita is what sets it apart from other types of bread. It is soft yet sturdy enough to hold a variety of fillings. This balance is achieved through careful kneading and resting of the dough, allowing the gluten to develop properly.
Baking pita at home can be a rewarding experience, connecting you to a rich culinary heritage. The aroma of freshly baked bread fills the kitchen, creating a warm and inviting atmosphere. It’s a simple pleasure that brings people together.
Whether enjoyed warm from the oven or used as a base for creative dishes, pita remains a beloved part of Israeli cuisine. Its adaptability and delicious taste continue to win hearts around the world.

Pita’s versatility makes it a favorite for many dishes.

From traditional pairings with hummus to innovative wraps and sandwiches, pita’s versatility is unmatched. It serves as a canvas for culinary creativity, allowing cooks to experiment with flavors and textures. This adaptability has helped pita maintain its popularity across different cultures and cuisines.
The communal aspect of sharing pita is also significant. In many households, tearing and sharing pita is a symbol of hospitality and togetherness. It brings people together, fostering a sense of community and connection.
As you embark on your pita-making journey, remember that each loaf is a piece of history. Embrace the tradition and enjoy the process, knowing that you are part of a long line of bakers who have cherished this humble bread.

Related Recipes

FAQ

Can I use whole wheat flour instead of all-purpose flour?
Yes, you can use whole wheat flour, but you may need to adjust the water content slightly.
What temperature should I bake pita at?
Pita is traditionally baked at a high temperature, around 475°F (245°C), to achieve the perfect puff.
How should I store leftover pita?
Store your pita in a sealed plastic bag at room temperature for up to two days or freeze for longer storage.